The controller can be used to perform all 3 primary functions in CalcVR:
All these functions can be customized to your liking in the app Settings. Before we examine these more closely make sure you have downloaded the CalcVR app to your phone and connected your Bluetooth controller. We will be showing screen shots for setup using an Android phone with a basic controller, so your equipment and screens may look different but should have the same process. This process should only need to be done when initially setting up the CalcVR app (and not every time you use CalcVR.)
Selection/Click
Some click such as Buttons, Toggles, Sliders, etc. can be interacted with in the CalcVR App. In place of the customary mouse pointer, you may notice a small reticle (“dot”) ![]() . This reticle (“dot”) expands and turns into a circle when something can be clicked or selected (see picture). You can change selection/click button in Settings.
. This reticle (“dot”) expands and turns into a circle when something can be clicked or selected (see picture). You can change selection/click button in Settings.


Rotation
Any joystick on your controller can be used to rotate certain objects of interest. This can also be accomplished by clicking on the panel when it appears. If the rotation is not working as expected, you can change the controller options in Settings.


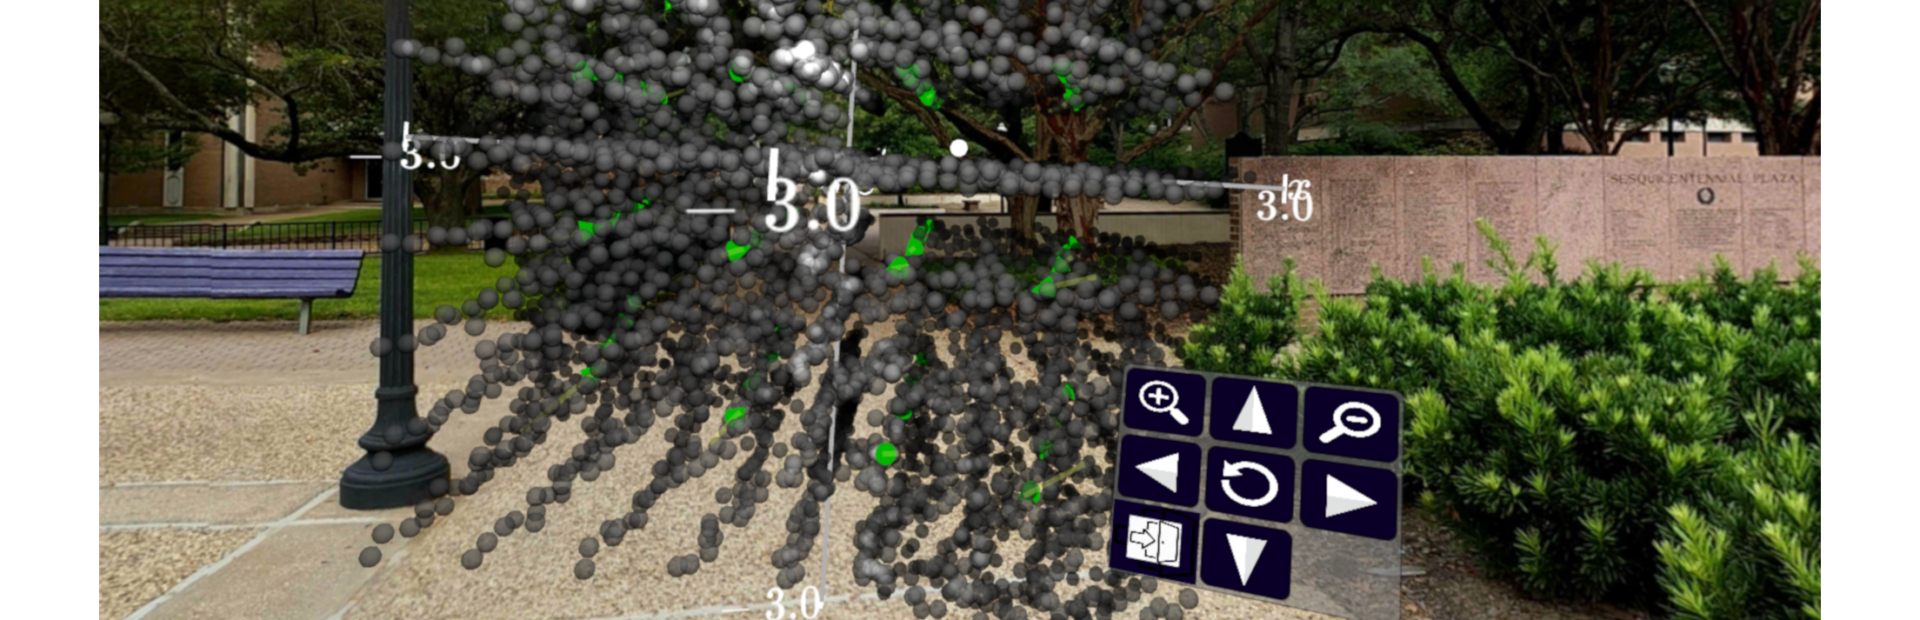
Zoom In and Zoom Out
Some objects in the CalcVR App can be made smaller or larger (zoom in and out). This can be accomplished by clicking buttons on the panel. However, for ease of use, two buttons on your controller are mapped to zoom in and out functionality. These differ by controller and can be set to your liking in Settings.


Setting the Controller
Based on if you are using Android or iOS, default controller buttons are chosen for
Selection/Click, Zooming In, Zooming Out, Joystick Up/Down/Left/Right Directions*
However, these can be easily changed in 3 locations in the app.
- Settings accessed from the opening Menu
- Tutorial accessed from the opening Menu
- VR Settings Menu accessed inside any virtual reality scene in the App by looking down
*Note: When you set the UP direction on the controller, the LEFT, RIGHT, and DOWN directions are also set. Also, when you set the RIGHT direction, the LEFT direction is also set.


An older version of this guide can be found in this Video: